Here we go! Thanks to all of you who voted for what would be the next challenge – and this week it begins: The “Hack” Challenge, where each week we come up with a new DIY project, upcycling an item from it’s original purpose into something new, usually some kind of home decor or furniture type project. And so onto week 1… Solar Powered DIY Paper Lamps!


Generally when I come up with an idea for something I would like to turn into a lamp or use in lighting, I run into the same problem: it is not an object that would be safe to light with an interior candle, and it can not be easily wired. But for this week’s project, you don’t have to worry about either one. Since these are solar powered, they don’t need any wiring, and there is no flame to worry about. We’re “hacking” into yard solar lamps to create our own glowing paper lamps. I think these would be lovely in a collection as part of a centerpiece for a dinner table, or lining a deck railing for an evening gathering, or anywhere ambient lighting would be a nice touch!
All you need are…
– some solar powered lawn lights, one for each lamp. You can pick these up for just a couple dollars.
– an old illustrated book (encyclopedias are perfect because of the variety of types of images!)
– and a pair of scissors

Make sure you get the type of solar lawn light that has a square head, and then stand them outside in direct sunlight to get their charge.
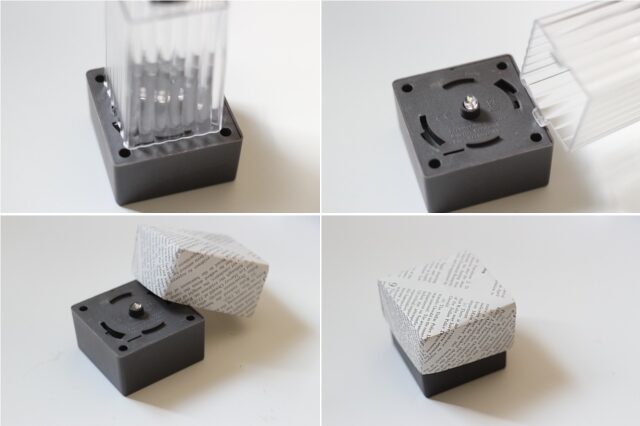
Choose an page from the encyclopedia, or whatever paper you choose to use, that has a design you want to be the “shade” of the lamp, bearing in mind that whatever is on the back of the page will also shine through. Cut a square out of that page. The size ratio that I used was this: for a 2.2 inch square solar lamp head, I used a 5.5 inch square paper. Here is how you turn that piece of paper into an origami box to use as the “shade” for your mini-lamp:

I made three separate paper “shades” for the lamps, all from the same encyclopedic volume from 1965: one was an outer space photograph, one was a map, and one was simply text.

Once the solar lights have charged, bring them inside, and disconnect the top, which contains the light bulb, from the rest of the body. You’ll probably be able to do this by simply partially twisting the top and then lifting.

Fit the paper box shade onto the solar light unit. If there is still a fair amount of light where you will be displaying these, you’ll probably need to sit them face up, so that the solar panel is downward, and not absorbing any light, so that the light will turn on, as shown in the first photo below. But if it will be dark, I think they also look very nice displayed on their side, as shown in the second photo below. Either way, you now have a unique piece of ambient lighting, which can be changed to a completely different design by simply making a new origami box to go on top!


Remember to recharge the lights before their next use – just remove and set aside the paper, and reattach the light to the top of the yard light, and put it back outside!
So, what do you think of week one of the hack challenge?
What type of paper would you use on top of your lamps?
Leave your thoughts and comments below, I love to hear from you! 🙂


