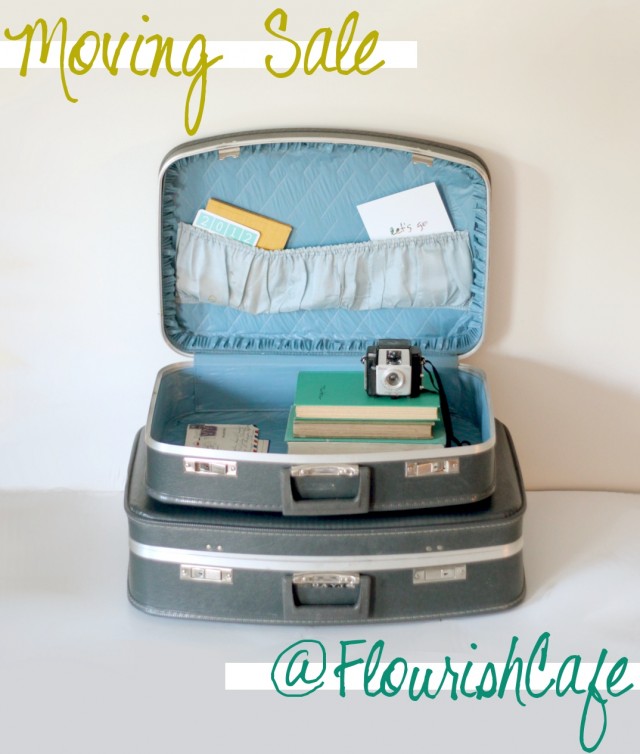

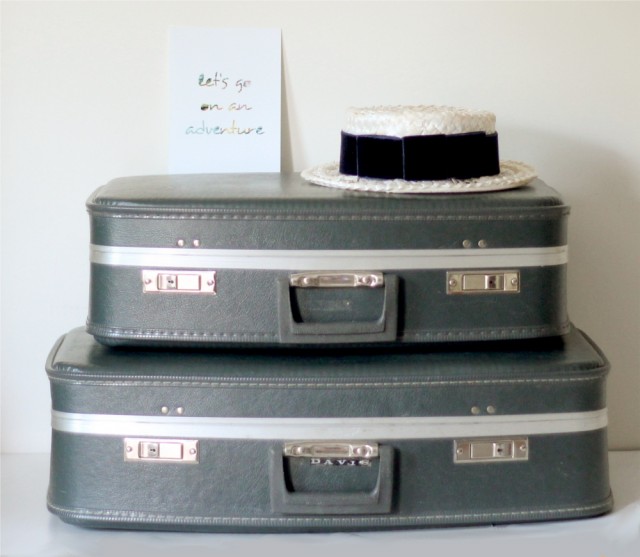
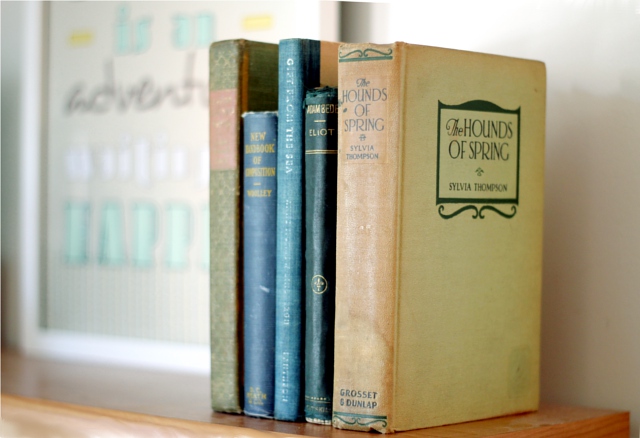
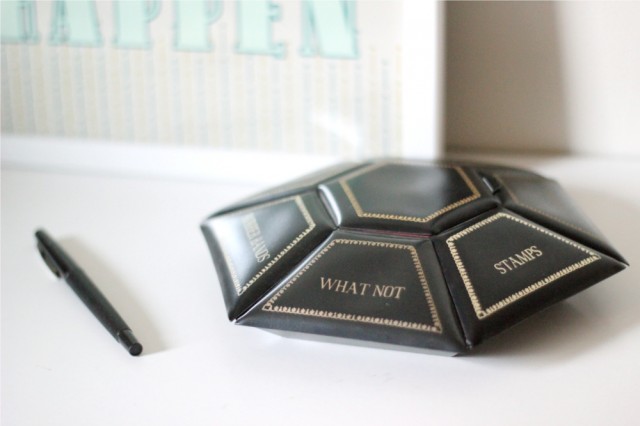
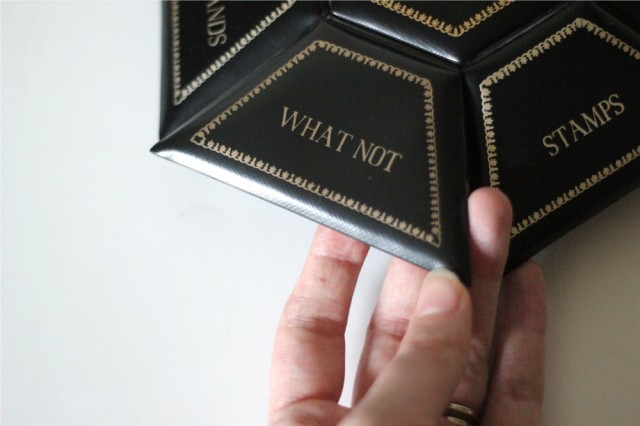
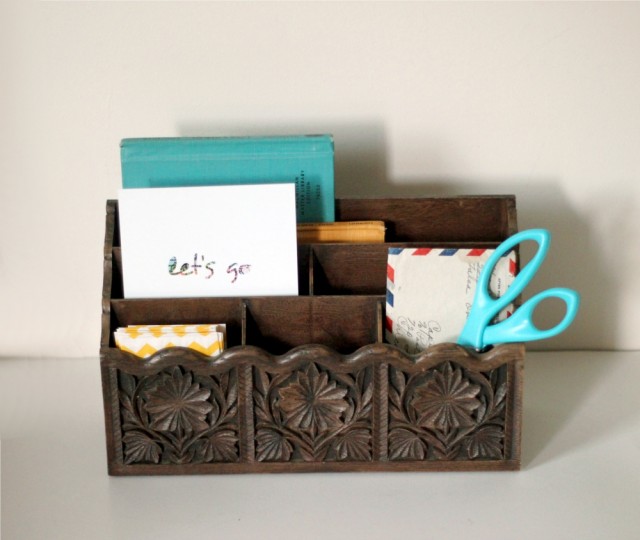
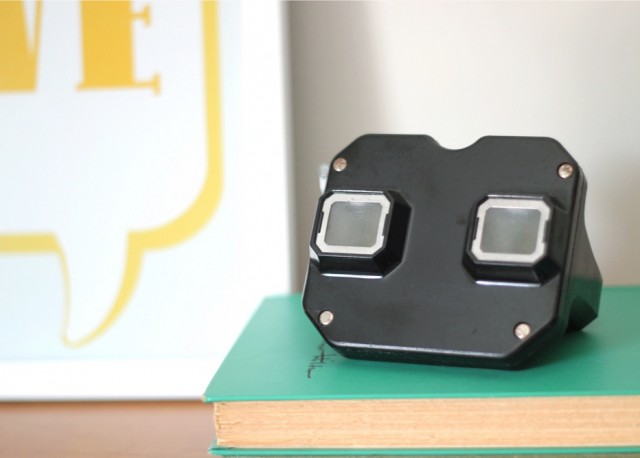
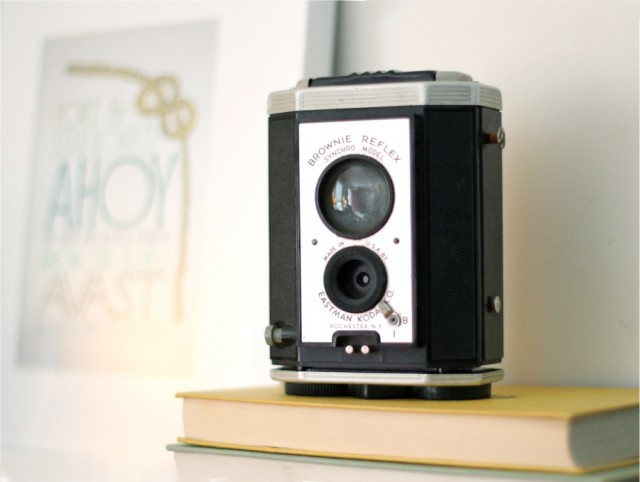
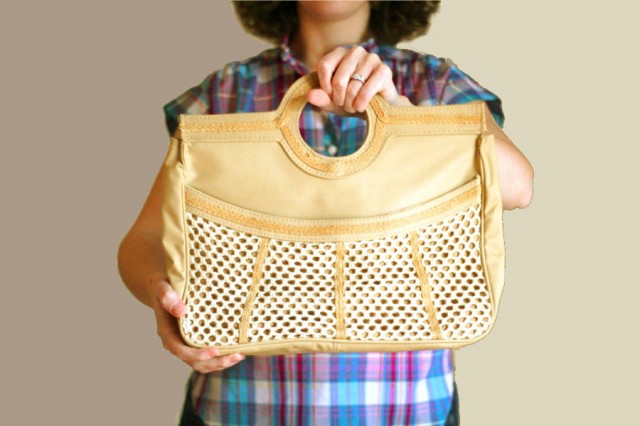
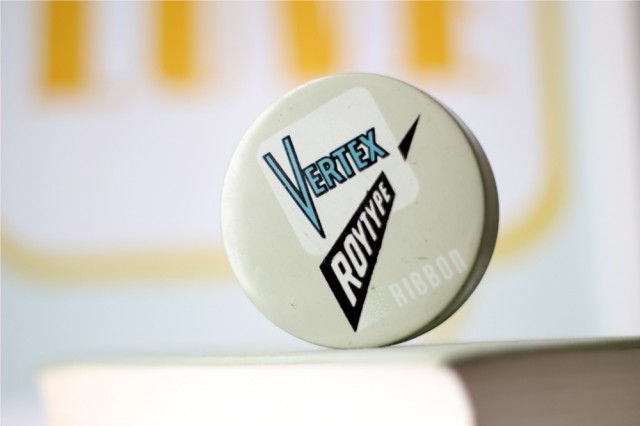
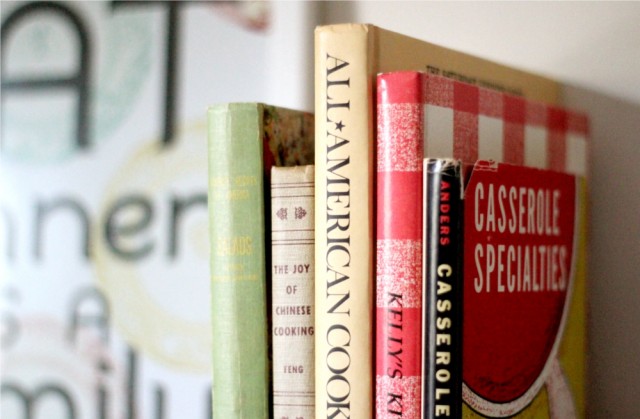
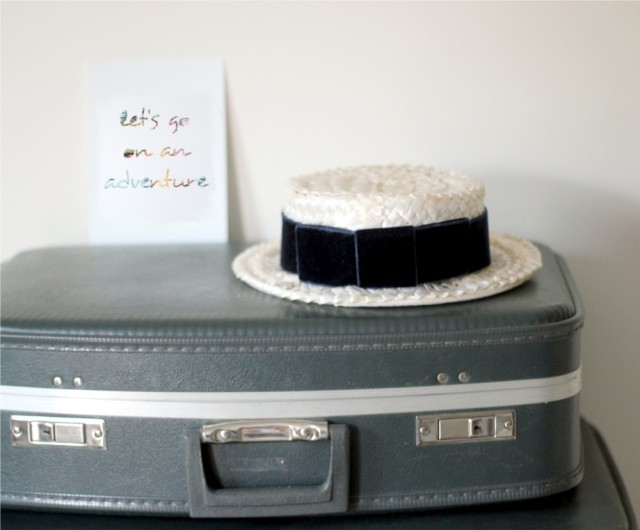
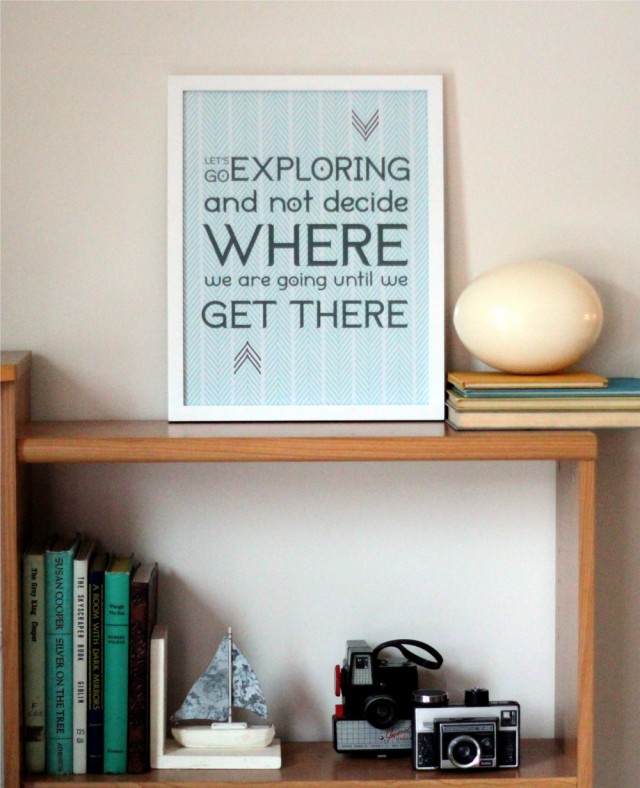
So, as many of you know, we are trying to move to Boston! As you also may know, besides my art prints I also sell some vintage items in my shop as well. What you probably DON’T know, is that I have a huuuuge inventory of vintage stuff – much more than is in my shop – and I do NOT want to move it all to Boston! So … the number of vintage items in my shop has been growing – and I want to have a sale on all vintage items in my shop: 30% off all vintage items with the coupon code LETSMOVE. I’m highlighting some of the items in the post below (just click any photo to go to the item), but the coupon is good for all vintage items in my shop … click here to see all the vintage items- and I plan to be adding more continually until we move!
PLUS, as I announced earlier, each month this summer I’m going to pick one print from my shop and offer it at half off just for that month. You’ll find this month’s print-of-the-month at the end of the post!
PLUS, just for fun, I’m throwing in some vintage tips scattered among the vintage items below, I hope you’ll find them helpful. 🙂
Tip #1: Why vintage? Quality > quantity. As we are trying to downsize for our move we are taking a much more quality not quantity approach to our belongings. Many of the things that I know I will keep in our move are vintage items – items that are sturdy and have lasted well through the years and previous owners already, items that are classic and won’t be some trend that feels “so last year” in a few months, items that are of a better quality than the cheap version I could grab at the store today. Plus, on a more personal level, I think vintage items have so much more character!


Tip #2: How do you use vintage in décor? Highlight, don’t go matchy-matchy. Working a piece of vintage décor into a room is similar to working a piece of vintage clothing into an outfit – if every single article of clothing in your outfit is from the 1950’s, you’re going to come off as costumey. Instead try pairing a 50’s skirt with a modern top. The same for décor – if every shelf is covered in old knick-knacks, it will just become overwhelming visual noise. But if much of the room is simple clean lines, you can highlight some special vintage items or furniture and let them really pop by working them in with more simple or modern pieces.

Tip #3: How can I tell if a clothing item is vintage? Labels! Clothing labels tell a huge amount of information about the age of the garment – you may not be able to date every garment by the label and there are many other ways to date a garment, but you might be surprised at just how much you can learn from labels. For instance, did you know that on Levi’s jeans labels if the e is lower case then they were made after 1971 – but if the E is upper case then they were made before 1971? This tip and tons more are available on the Vintage Fashion Guild website, where they have a huge a-z resource on vintage clothing labels.
Tip #4: What’s the difference between vintage, antique and retro? Age and/or style. Vintage items, according to Etsy, have to be at least 20 years old … elsewhere vintage is often considered to be need to be at least 25-30 years old. Antique is significantly older – generally 100 years old or older. (That is for furniture, housewares, clothing, etc. There is a different standard for vehicles, but that’s not really my area.;) Retro generally refers less to a certain age of an item than to certain styles, so it is more nebulous. For instance you could have something modern made, but made to look like the style of a previous time, and so it would be called retro. Often retro refers to the style of the 40′s or 50′s, but doesn’t always have such a narrow meaning.
Aaaand now it’s time for the print of the month!
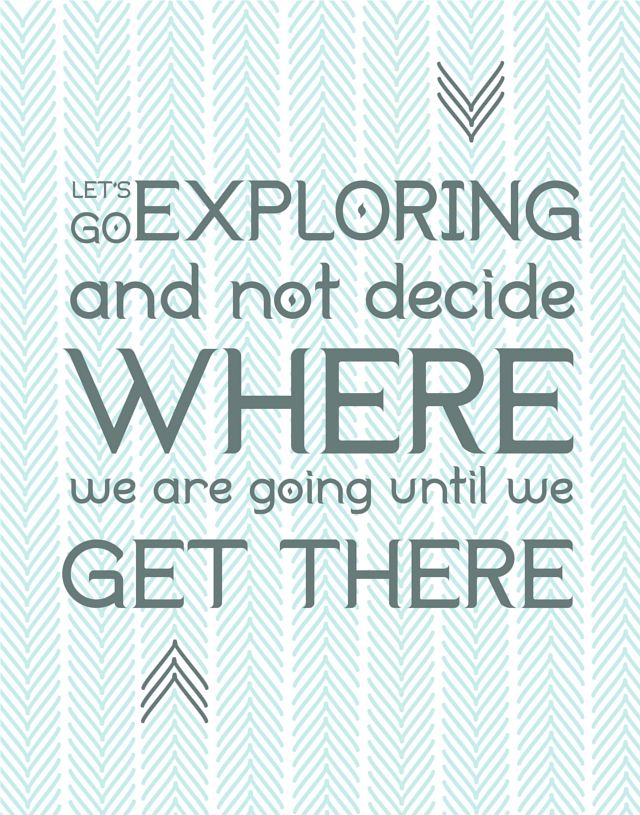
This is a pretty popular print in my shop, and with moving and travel on the mind, I thought it would be a fun one to go with for this month. It’s a nice large print at 11×14 inches … usually it’s $35, but with the coupon code FROMTHEABODE it would be 50% off, for only $17.50. (Plus shipping. The coupon is only valid for this print and only during July 2012. Any other purcahses would need to be made in a separate transaction.)
WooT! Let’s go exploring!
Well, I hope you’ve seen something that tickles your fancy, or at least that the tips were useful. 🙂 Here again are the coupon codes-
For 30% off all vintage items: LETSMOVE
For 50% off July’s print-of-the-month: FROMTHEABODE
If you know someone who likes vintage, please consider sharing this post with them – I want to get rid of as much as possible before we move! Thanks! 🙂
Leave your thoughts and comments below, I love to hear from you!
Posted in creative biz, etsy, home decor, style, vintage
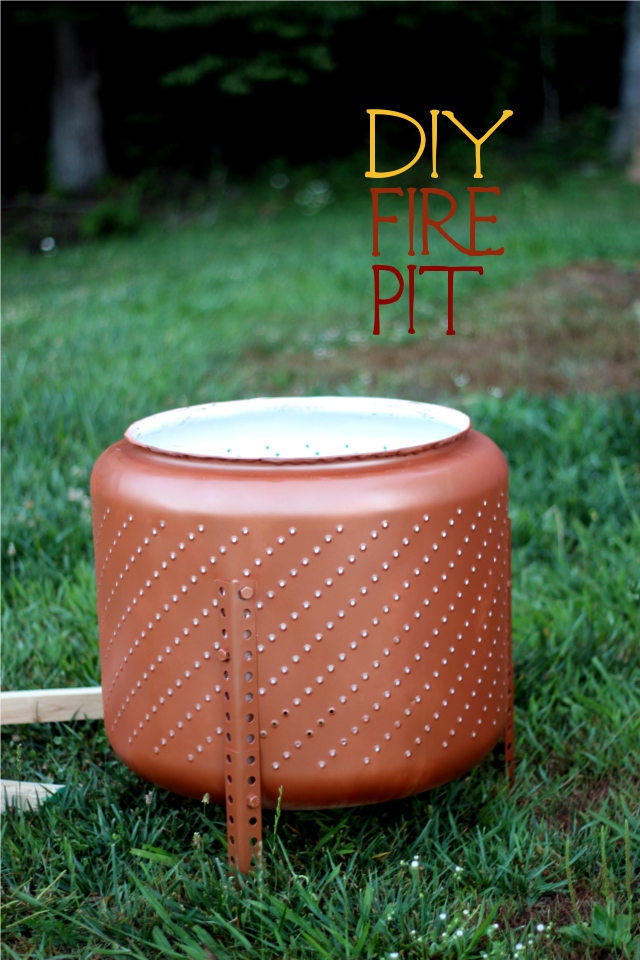
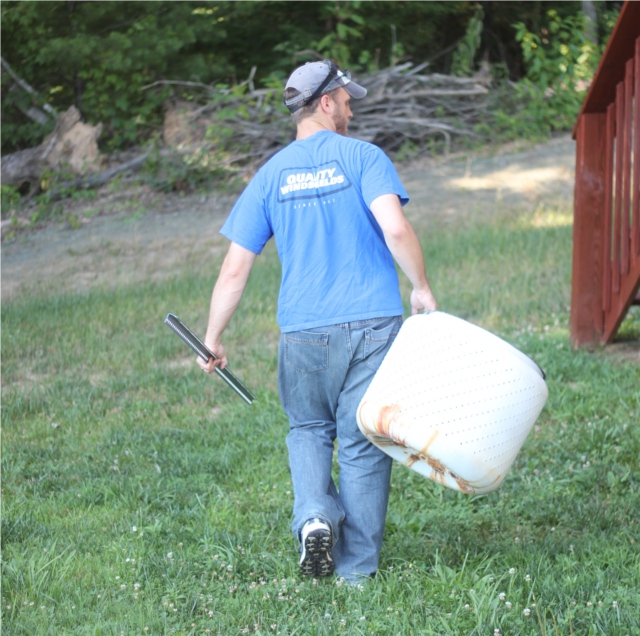
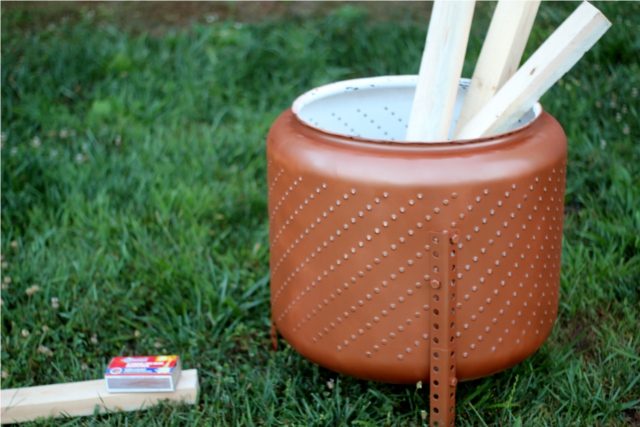
Well, it’s the last week of the upcycling hack-challenge! The project for this week is an idea that Tim heard of a while back, and we were hoping to get to do at some point in the series, and luckily we found out a couple days ago that we would be able to get our hands on an old metal basin from a washing machine – just in time! 🙂 These metal basins make excellent fire pits because of the holes all over them, which allow in plenty of air and help keep a fire going strong with very little effort. So here is a tutorial of how Tim converted one into a fire pit!
Here’s a note from Tim: If you want to try this yourself you can find a wash tub from a large appliance repair store (we got ours from a local Maytag store that let us have it for free) or try your luck at a junk yard. The spray paint, the legs and their hardware cost < 25$.
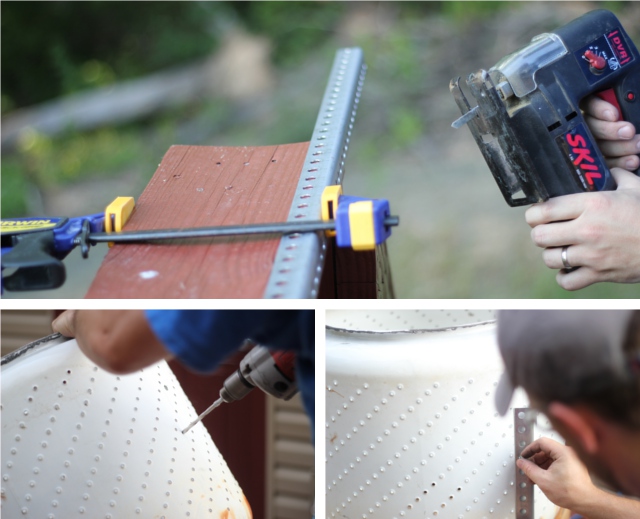
Take a metal basin from an old broken washing machine – it may be rusty on the bottom, as you can see on this one. But the first step is to fix the top edge, which can be sharp and ragged. Bend down the edge all the way around, and then crimp down the edge underneath to finish.

Then, you’ll need to remove the center piece, because it juts up in the middle of the basin. Turn over the basin, and carefully cut around the center.

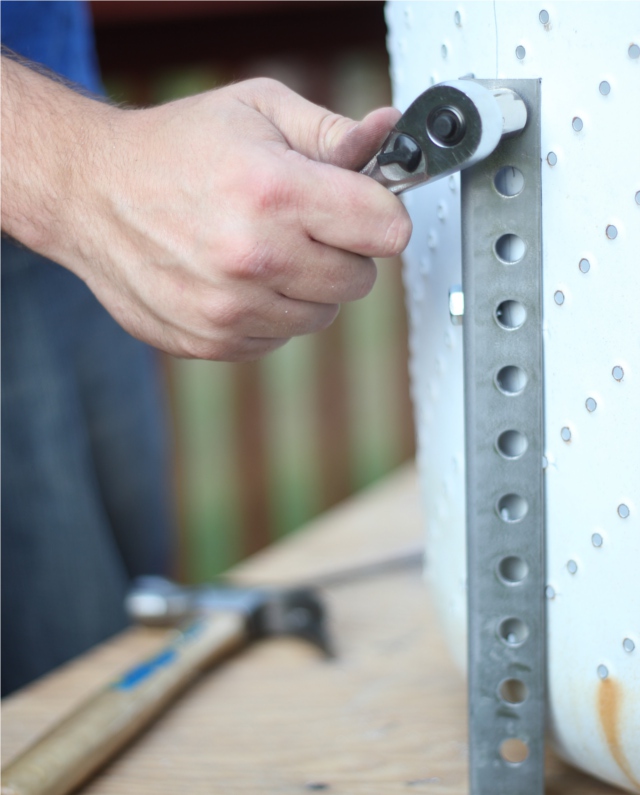
Cut six equal lengths of perforated angled bar, for the legs. Three will be attached directly to the sides of the basin, and the other three will bolt onto those, to give you some flexibility in adjusting the height. Tim chose a three-legged and adjustable height design to make it more stable if the ground is uneven. Measure around the basin, and divide in thirds (Tim actually found on this particular basin that the number of holes going around it were divisible by three, which made it easy to find the thirds.) Mark and drill holes on the side of the basin to fit the bolts, and then attach.
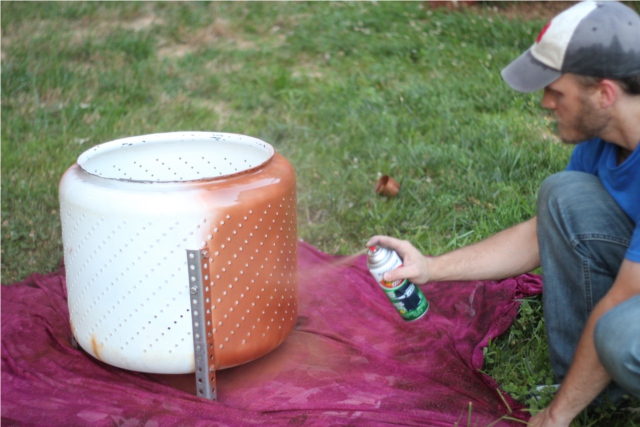
Spray the outside with paint that is high heat resistant and helps prevent rust- I chose a copper color, and I really like how it turned out!

The holes all over the basin help to draw in plenty of air and help keep a roaring fire!
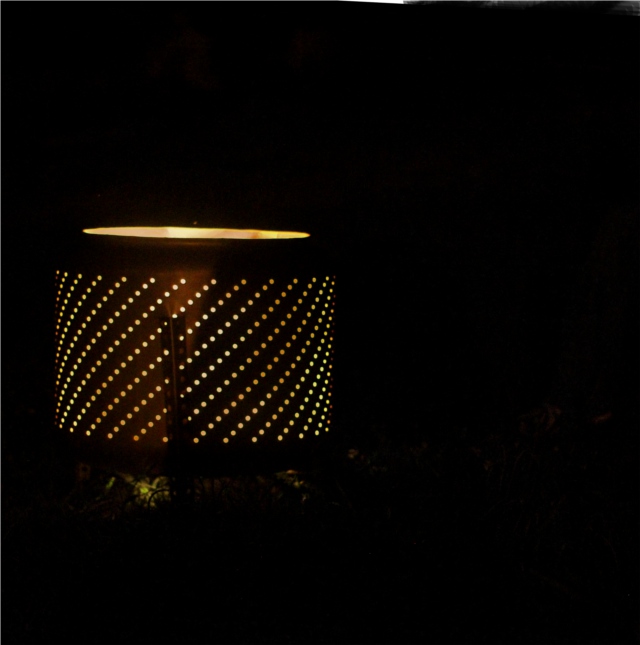
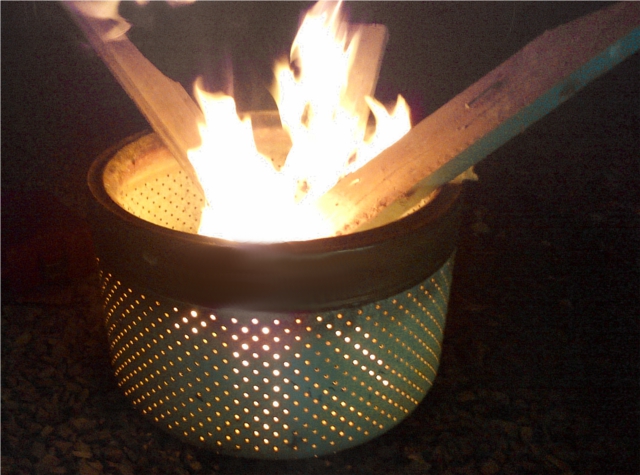
Unfortunately, with the hot and dry weather we’ve been having, there is a burn ban right now, and so we weren’t able to actually light a fire in it to photograph for this post – I put a lamp inside it for the photo above, to give a little idea of how the light shines around it, because it is one of the things I love about this fire pit. But here is a photo which a friend of Tim’s sent over, who also has a fire pit made from a washing machine basin:
As always, use safe practices when working with fires.
Well, I hope you’ve enjoyed all the hack-a-week challenge posts – and that you’ll be sticking around for the new challenge which starts next week – all about doing your own blog design makeover!
Have any ideas for future challenges?
Leave your thoughts and comments below, I love to hear from you!
Posted in Challenge, hack a week, Tim, upcycling
Hello people … well, I guess we know each other pretty well now, eh? So I’ll tell you .. I almost decided not to put up this post today. As I am writing this (Tuesday evening), I am wrapped up in cover and have a mug of tea in hand – I have just not been feeling very well today. Because of this, I feel like I don’t have the full focus I like to have when dealing with such an important topic as what we’ve been discussing on Wednesdays. I want you all to know that I don’t write these things lightly, but I write them with much prayer, study and thought. So I thought about just skipping this Wednesday entirely, but instead I decided I could go ahead and write a truncated post with just one simple point … and then go relax with my tea. We’re all friends here, right? I can talk to you with messy sick-day hair and under blankets, eh? 🙂
So here is the one simple point: you can’t make or force someone else to believe something.
Even if it is the truth, you can’t force someone else to accept a belief. We all have free will and make our own choices, right or wrong. A person might be presented with a point, and upon examining the evidence come to the conclusion it is correct. Or a person may be presented with a viewpoint and choose to believe it simply because they want it to be true, without examining any evidence. Or a person may be presented with a viewpoint and not believe it because they do not see enough evidence to believe it. On the other hand, a person may be presented with a great deal of evidence, and they may see that the conclusion makes sense – and yet make the decision to not accept it anyway. For instance, if you meet someone who says they don’t believe in God because it means they would have to change their life … that’s not really an argument for whether God exists or not, that’s an argument for whether or not that person personally chooses to believe in God or not. They may or may not have examined the evidence … but in the end, their reason to not believe isn’t based on that, it’s based on their own conscious choice that they don’t WANT to believe. Similarly a person may hold a certain belief or viewpoint not so much because they feel the evidence is the most reasonable, but because they simply WANT to believe it.
So as we move forward in the series, and look at some different evidences, realize that there are a couple ways to accept or reject a viewpoint. It is one thing for someone to reject a point because there is insufficient evidence. But it is something different entirely to reject something simply because it is inconvenient or uncomfortable. You can’t force someone to have faith in something – it is the job of each one of us to keep an open mind (as we talked about before) – not so that we just believe anything and everything – but so that when we do come across the truth on any topic, we accept it, even if it is not convenient to our wants and wishes.
Alrighty, well there is today’s post. I’m going to go relax and enjoy some tea now. Thanks for spending time with me … even when I’m not feeling great. 🙂 Leave your thoughts and comments below, I always love to hear from you!
Posted in bible, truth and evidences
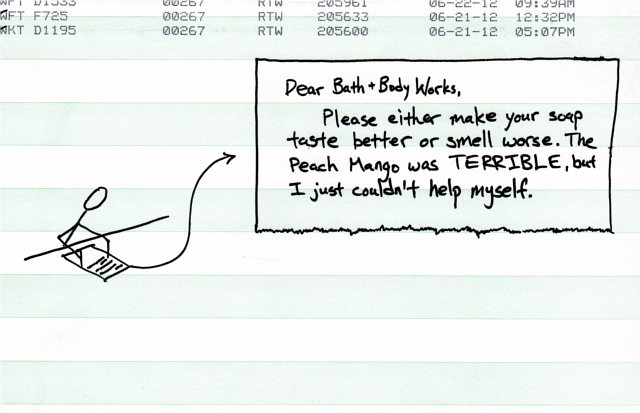
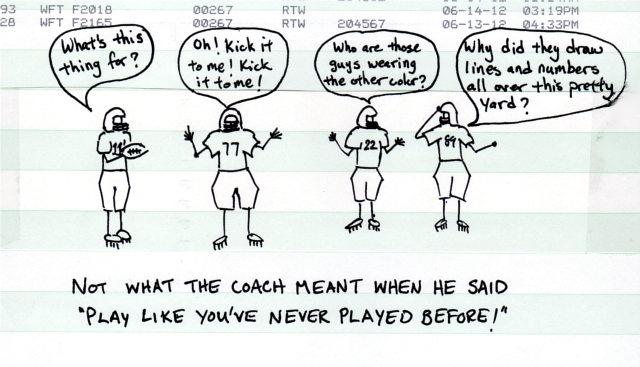
…but maybe the Cucumber Melon will be different. Or the Kiwi Strawberry.
(You can see all of Tim’s RTW cartoons, which he draws each week on work faxes, here.)
Posted in humor, RTW Cartoon, Tim
So, last week I tried to post some clues to see if anyone could guess what the next weekly challenge would be … buuuuut apparently I’m pretty bad at clues, haha! But the hack-challenge ends this week and next week is the start of the new challenge … so instead we’ll just skip to the announcement. 🙂 It’s one that was suggested by one of you when I asked for challenge ideas a while back – and I’m very excited about it!

It’s a DIY blog redesign series! Basically, as a graphic designer I will be demonstrating how to do a complete blog makeove by taking a reader’s blog, overhauling it, and each week showing tips, how-to’s and instructions to also be able to conduct your own blog redesign. We’ll start from scratch on how to establish the look and branding you want to go for on your blog, and work all the way through to setting up or transferring a blog to WordPress, designing your blog to highlight rather than distract from your content, create a layout to encourage reader interaction, tools that can help boost your blog, and more. I’ll be posting each Friday for the 10 part series, Lord willing – it starts July 6th, and I’m so excited! If you’re a blogger, be sure to subscribe so that you won’t miss out on all the blog design tips.
UPDATE: Here are the posts in the series…
Part 1: Discover your branding with “The Drawing Board” Printable
Part 2: WordPress vs. Blogger
Part 3: Design Tips + Design Worksheet
Part 4: Themes, Coding and Stylesheets
Part 5: Making your own graphics
Part 6: 7 Blog Layout Tips to Engage your Reader
Part 7: Blog Page: The Must-haves and the Panache
Part 8: 25 WordPress Tips
Part 9: The Big Reveal
Part 10: 7 Ways to Promote and Market Your Blog
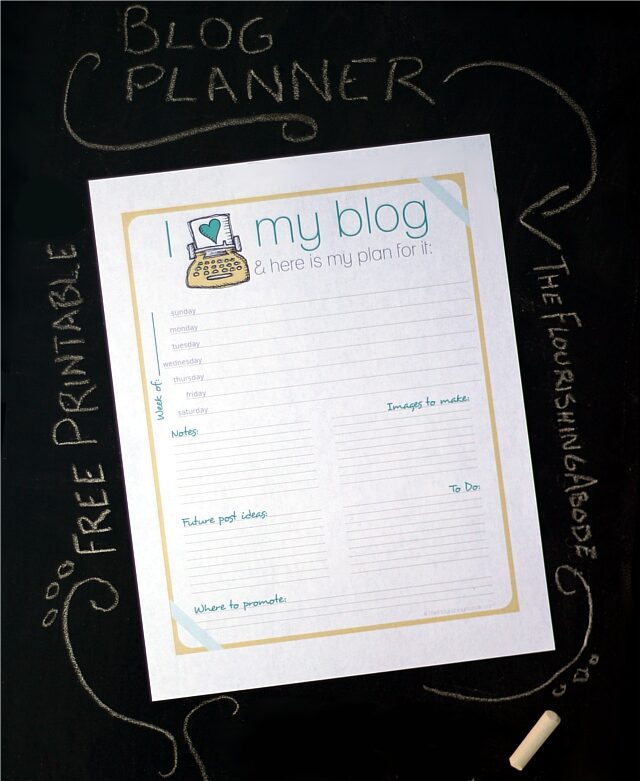
Until then, though, if you haven’t already gotten it, here is my free blog planner printable. I hope you’ll find it useful in organizing your blog posts! Just click the image below to open the PDF file.
Do you have a blog? Tell me a little about your blog in the comments below, and if you have any particular design questions you would like to see covered in the series, I’d love to hear them!
Posted in blogging, Challenge, creative biz, DIY Blog Redesign, organization, printables
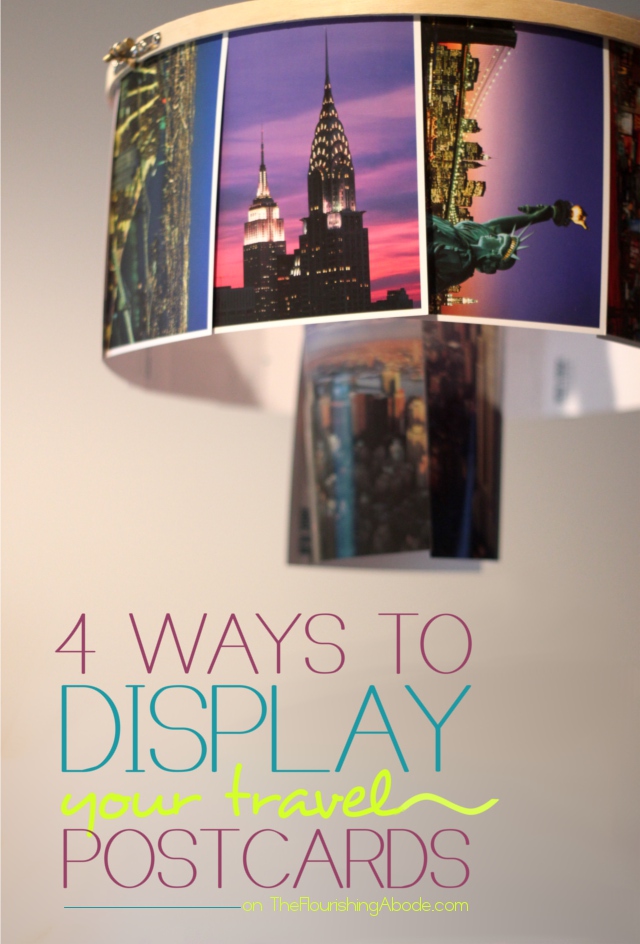
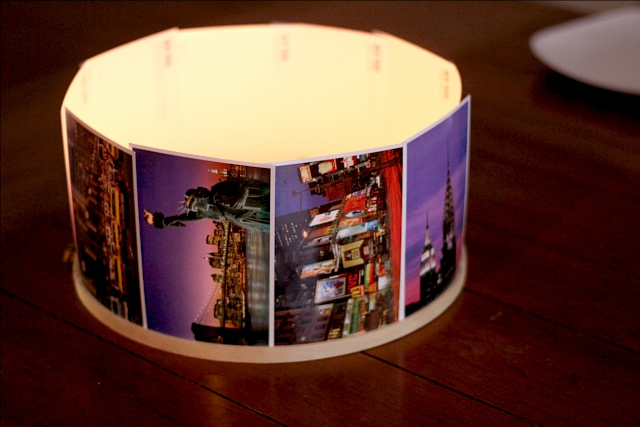
I love to travel – and I love to collect postcards from the places I go. They’re small, low-cost and lovely .. perfect to be able to collect some from each destination. However, most of my postcards live in a photo album and for this week’s upcycling hack challenge, I thought it would be fun to come up with some interesting and unique ways to upcycle and display postcards. And you only need one item for all of them: an embroidery hoop! Well … and your postcards, too, of course.
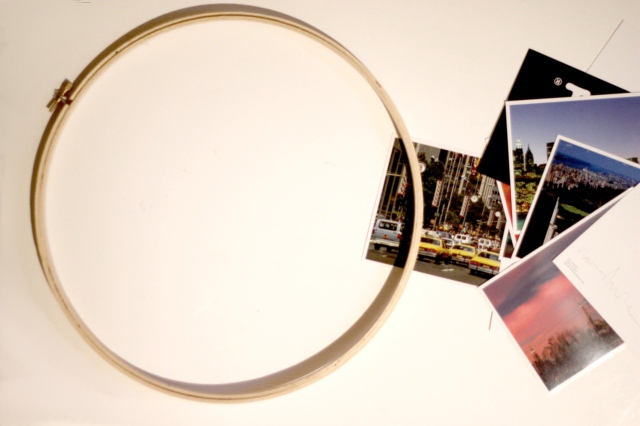
Use the screw to loosen the outer band of a 12 inch wide embroidery hoop, and stand your postcards in the space between the bands. Once you have your postcards lined up in a pleasing way, tighten the outer screw to hold the postcards in place.
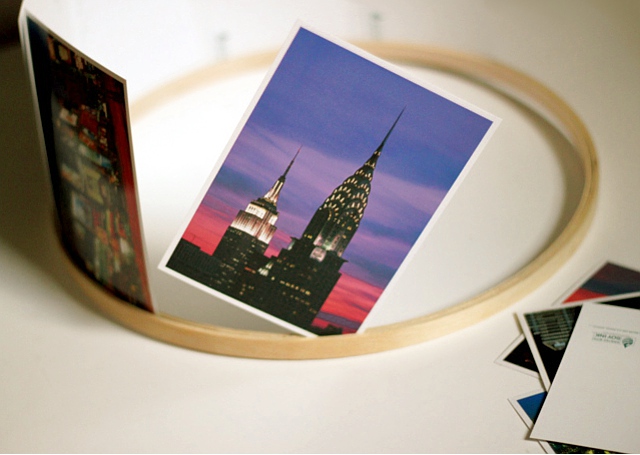

Pretty spiffy looking, eh? The first idea to display the postcards is just this easy, with the hoop standing on it’s side:
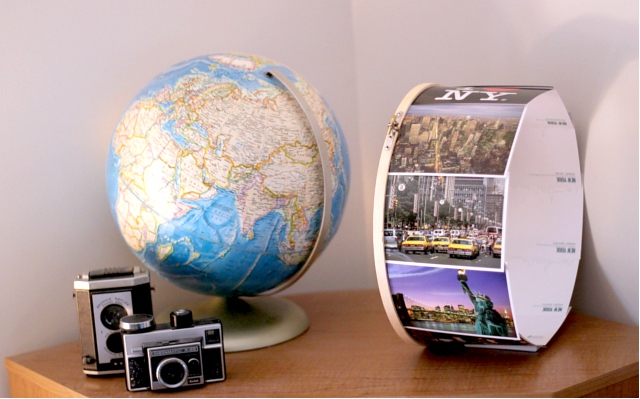
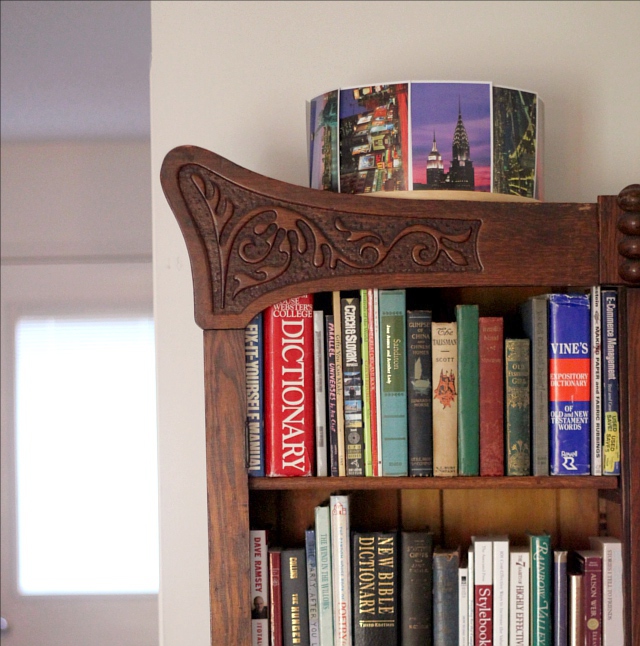
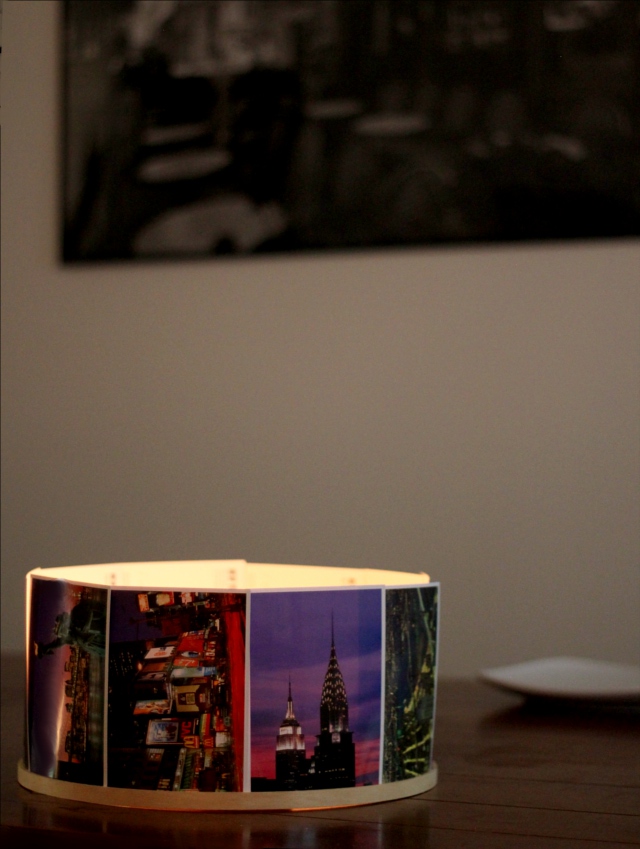
But another idea is to lay it on its base and to let it double as place is disguise storage. Sometimes there are items, like a modem or router, that you need to have out but you don’t really want to have visible. Set the postcard hoop on a shelf, on top of the fridge, etc. and just place whatever items you want to keep out of sight inside the hoop!
The third idea is to make a centerpiece out of your postcards! Put candles in the middle (just not too close to the paper postcards) and enjoy the glow of the places you’ve visited.
It might be neat to use for wedding table centerpieces, and have postcards from places that are special to the couple. You could even have guests each take a postcard and write a bit of marriage advice on it, and then put it back in the centerpiece. If you’re worried about the flame, one reader suggested battery operated tea lights – great idea!
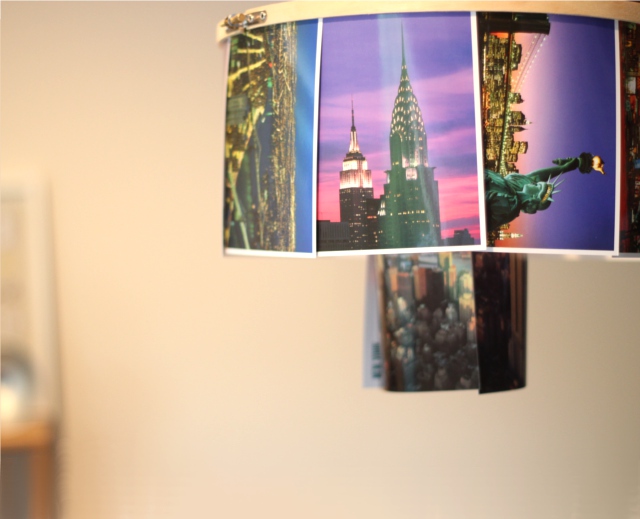
Or, for the last idea, if you’re feeling more ambitious, line multiple embroidery hoops of different sizes with postcards, and hang them at staggered heights to create a chandelier effect.
I hope you liked these simple ideas on how to upcycle an embroidery hoop and display your postcards. And I’d love to hear – how do you display your postcards? Or do you collect something else from your travels?
Leave your thoughts and comments below, I love to hear from you!
Posted in Challenge, hack a week, home decor, organization, style, travel, upcycling
The opposite of true is false.
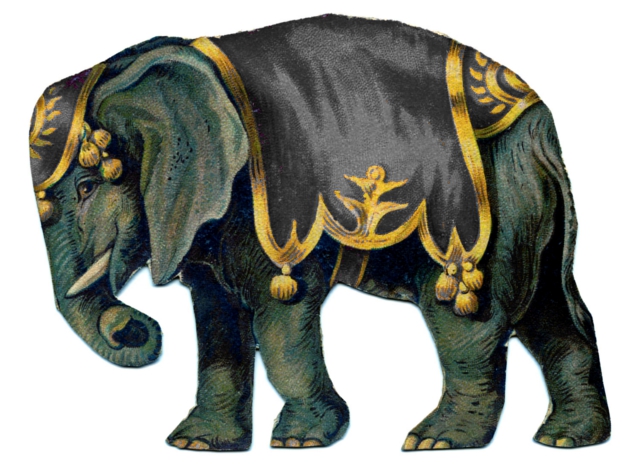
Well, I guess that may seem a little obvious, eh? But it is still important to establish. 🙂 And if you’re wondering why there is an elephant there … well, that comes later in the post. 🙂
So last Wednesday in the Truth & Evidences series we discussed the fact that absolute truth does exist. And, naturally, the next thing that follows is that the opposite of true is false. But we also want to take a look at this question – are all religions just teaching the same thing, but in different ways? Because since there is absolute truth, and the opposite of true is false … if religions are teaching opposite things, then they can’t all be true – some must be false. But is that the case? Or are all the different religions pretty much the same?
One of the traits of truth is that it’s opposite is false. For instance, it is true for me to say, “I am a woman.” Therefore, it is false for me to say the opposite: “I am a man.” This is pretty self evident. However, is this the kind of difference there is between different religions? Incompatible contradictions? Or is it more along the lines of me saying, “I am a woman”, and then also saying, “I am 27.” Both are true. To be a woman and to be 27 are not opposites, it is possible for both to be true. Is this more what the differences in religion are like – not opposite, but just different truths that can both be true?
Many people would argue “yes” to that question. They point to the fact that most religions have some sort of moral code, some sort of be-nice teaching, and some sense of worship or appreciation of something beyond themselves. But is that all there is to religion? Do various religions have more differences or similarities?
Let’s just pick a question to pose to a variety of religions, and see if they are all pretty much the same.
– What was the origin of the universe?
My goal in this post is not to discuss which, or even if any religion’s answer to this question, is correct (we’ll get to that later), but rather to establish whether or not all religions are pretty much just the same.
So tell me, various religions – what’s the origin of the universe?
According to Taoism, there was a presence before the world existed in material form, but that presence was not a god, and that a series of transformations happened that became the universe. According to Buddhism, the universe never actually had a definite beginning, and will not have a definite end, but rather it is in a perpetual state of flux. According to Christianity, God (Father, Jesus, and Holy Spirit) existed before the world, and he created the universe out of nothing. According to Islam, God (Allah, not Jesus) existed before the world, and he created the universe out of nothing. And of course, there are many others that we could go into, but there are a few.
So pretty much the same answer? There was no beginning … there was a beginning but it wasn’t God … it was God … Jesus was there … Jesus was not there. Are they pretty much saying the same thing? No, they are directly contradicting each other. There is an absolute truth on the topic. And since the opposite of true is false – if any one of these is true, then all of the others must necessarily be false. And there are many other explanations put forward to explain the origin of the world as well. But not all religions are just saying the same thing in different ways. You could do this with any number of other questions: What is the penalty if I do wrong? What is man’s purpose in existence? Is there one God or many? What happens after death? Those are not just trivial insignificant questions to be brushed aside. They are fundamental to different religions … and different religions directly contradict others on these, and many other, core issues.
Still, someone might bring up the blind men and the elephant story to argue against this. And this is why there was an elephant at the beginning of the post. 🙂 If you haven’t heard the illustration, it varies some in different tellings, but it goes basically like this – there is an elephant, which represents the idea of “God”. And there are blind men standing around the elephant, each trying to figure out what it is. One man grabs hold of the trunk and says, “It is a tree branch.” Another reaches out and feels the tail and says, “It is a rope.” Another grabs a leg and says, “It is a pillar.” Another feels the side of the elephant and says, “It is a wall.” According to the story, each man had a part of the truth, but they were all still talking about the same elephant.
But the problem with the story is this – there is another point of view in the story than the blind men. There is the person telling the story. And that person realizes that there is one solid and absolute truth: the object in front of the blind men is an elephant. The blind men are not all “equally right” … it is not a rope, or a branch, or a pillar, or a wall – it is an elephant. To claim it is other things is false, because it contradicts the truth – that it is an elephant. And if the blind men continued to explore and learn about the object in front of them, they could come to discover that it was, in fact, an elephant.
In the end, since there is absolute truth, and since all religions are not just saying the same things, then necessarily some religions are false. Now, of course, the question comes – how can we know which are which? A good question, of course, which we will be coming to shortly in this series. 🙂
Leave your thoughts and comments below, I love to hear from you! 🙂
Posted in bible, truth and evidences
There are a lot of things said in English that don’t seem to mean what they’re meant to mean. For example:
Posted in humor, RTW Cartoon, Tim
So, the Hack-a-Week challenge only has this week and next week left and it will be finished – wow, 8 weeks can go by so fast! Anyway, for the hack challenge, I had you vote and choose what the challenge would be. But for the next challenge, I’ve already gotten a new challenge lined up – and I’m very excited about it! Plus, I am thinking that it is something that a lot of people will find helpful. But … since we have a little time before it starts, I thought it would be fun to play a little guessing game. I’ll give you a few clues below, and I’ll be curious to see if you can guess what the next challenge will be! 🙂

Clue #1: It involves having one reader as a volunteer in the challenge.
Clue #2: It will be a series of tutorials on something that many of you are involved in doing.
Clue #3: It is something I enjoy … and the fact that I enjoy it probably makes me a geek … and I am fine with that. 🙂
Clue #4: It is a project that you don’t necessarily need any physical items to do. (It would be possible to use a camera in the project, but you wouldn’t have to necessarily. The camera picture is just there to look mysterious and question-marky)
Clue #5: It is a makeover of some sort.
Leave your thoughts and guesses below! I’ll be officially announcing the answer next week, Lord willing!
Posted in blogging, Challenge
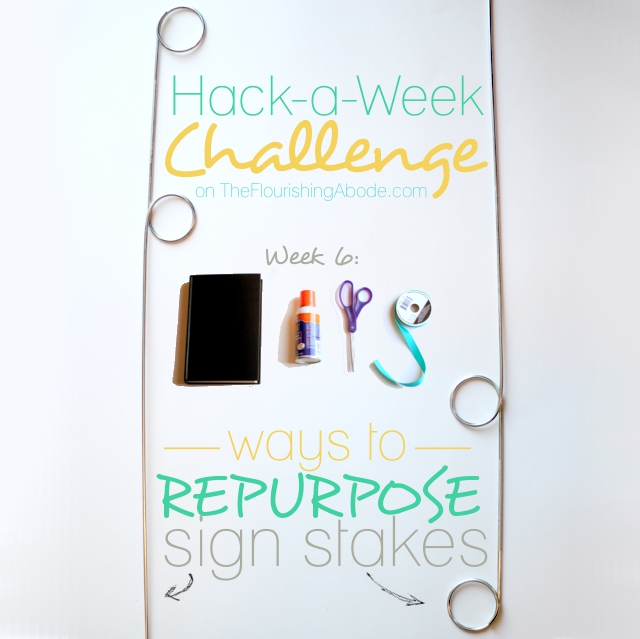
A couple weeks ago for the Hack-a-Week Challenge, I took the idea of a no-assembly-required hack and posted several ideas on that theme. This week is another multiple idea post, but this time all of the ideas revolve around upcycling the same item: a sign stake. You can pick one up at the hardware store for about a dollar, and ram it into the ground, and use the two coils to hold up a sign (as it is intended to be used) … or you can buy two and think outside the box on how to use them!
A couple points … You might prefer to spray paint them first, but since I was using the same ones for different projects, I just left the neutral metallic. And if they sit too low to the ground for your preference, you could insert them into two planters, instead of the ground, to make them higher and also be able to display indoors. Here are the repurposing ideas I came up with…
‣ ‣ ‣ IDEA #1: Bunting Holder!
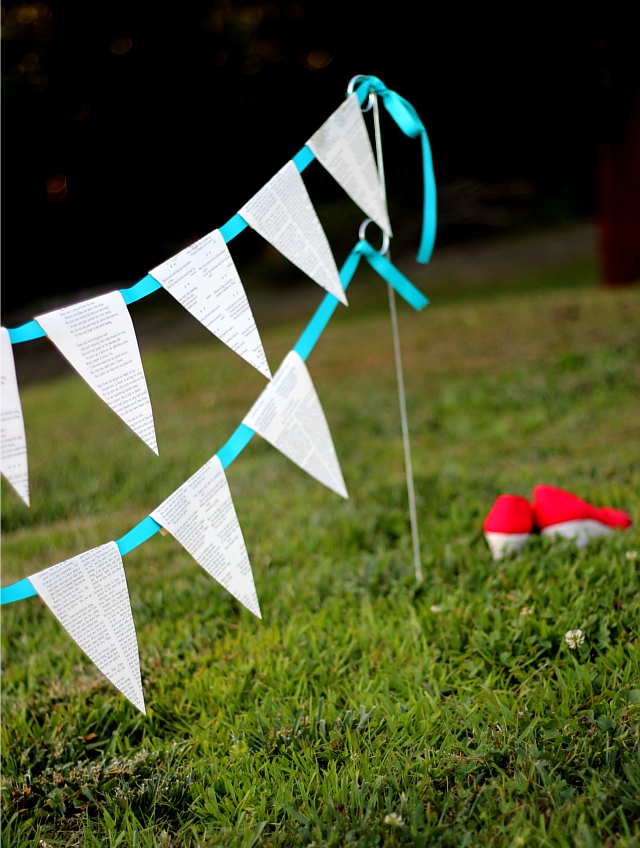
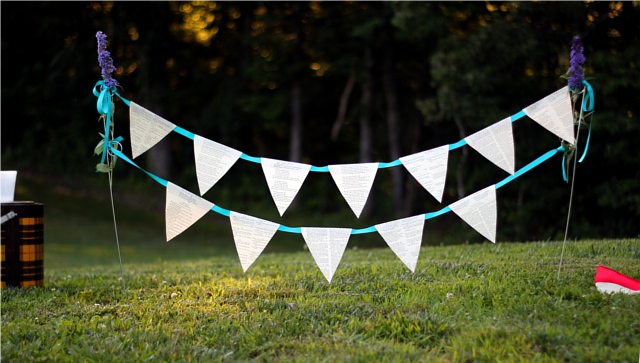
I simply love buntings, but the two things that generally stop me from making/displaying them are that 1: time-consuming sewing is involved, and 2: I don’t seem to have any handy ways to hang them. But this bunting setup solves both of those problems!
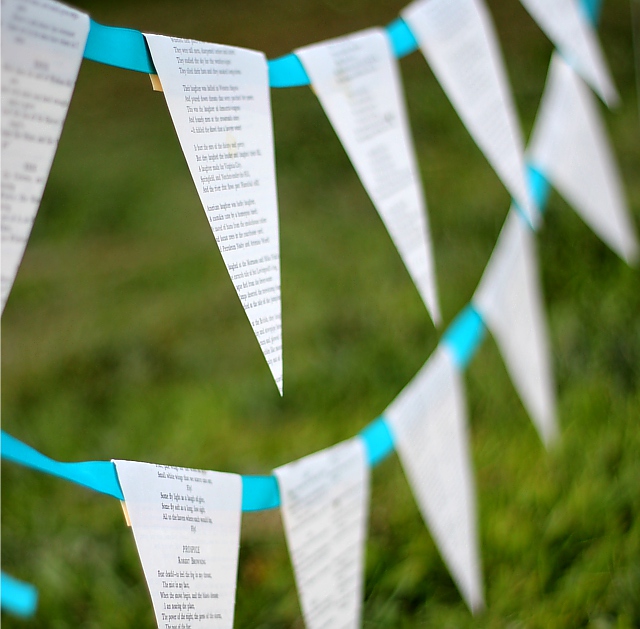
Instead of a fabric bunting, this is made from book pages and ribbon, so it is a completely no-sew project. Simply find a book that is no longer used for reading (you can find plenty of beat-up books at the thrift store), remove pages from the book, and then cut out the shape you need for the bunting pennants. For the kind of bunting I made here, it’s just a triangle with the top side extended and reshaped to be able to fold over the ribbon and still have enough overlap past the ribbon to have a gluing surface to hold it together. Then just spread glue on that top edge, and fold each bunting piece over the ribbon – and you have your bunting! I made two lengths, because the sign posts have two loops, and I liked the idea of a double layer. Stick the sign posts in the ground, and tie on the bunting. If you want to make the metal loops less noticable, you can just weave something decorative through them – for instance, I used a couple long stemmed flowers:
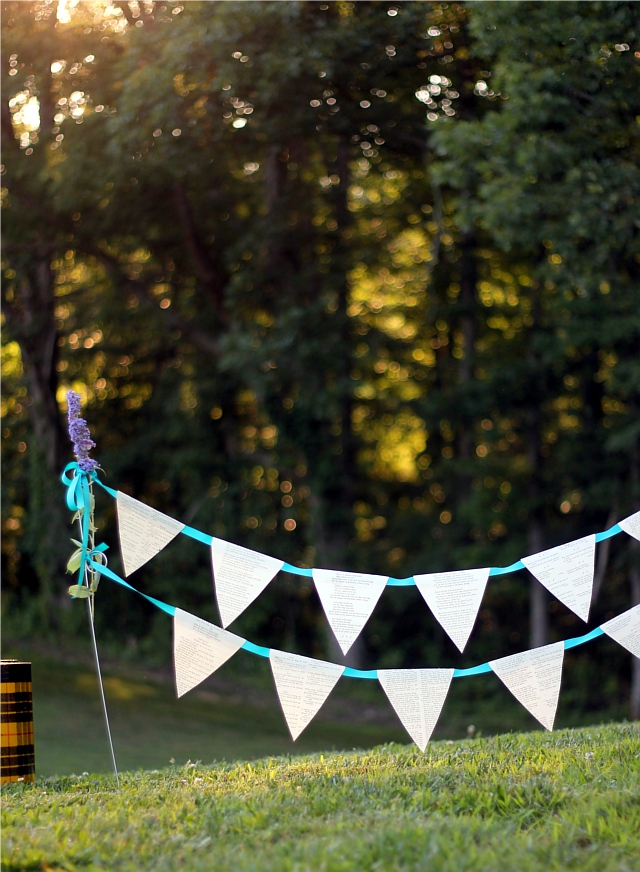
Now, isn’t that cheery?
‣ ‣ ‣ IDEA #2: Have a kid’s painting party!
My little one loves to paint. Our apartment has carpet in every single room – and in most rooms, very light carpet. So basically any painting has to happen outside! Which is a lovely place to paint, of course, but the main problem is that the wind likes to sweep away the freshly made masterpieces. But stick a couple sign stakes in the ground, tie on some ribbon, gather art supplies and invite some other kids over to have a painting party! Display the new paintings, as they dry, by attaching them with clothespins to the ribbon. Depending on how many kids you have, you may want more than one “drying rack”, but the good news is that they are so cheap to make.
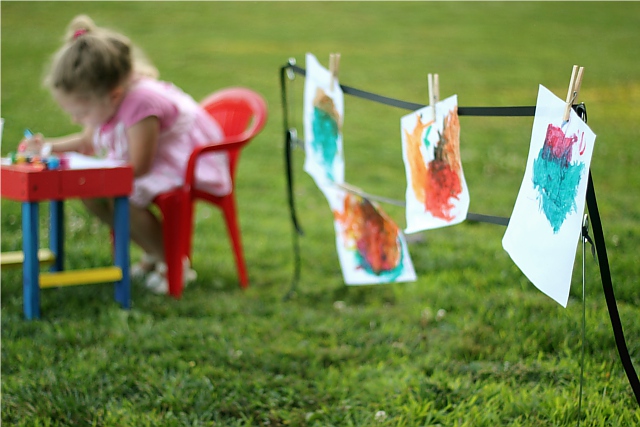
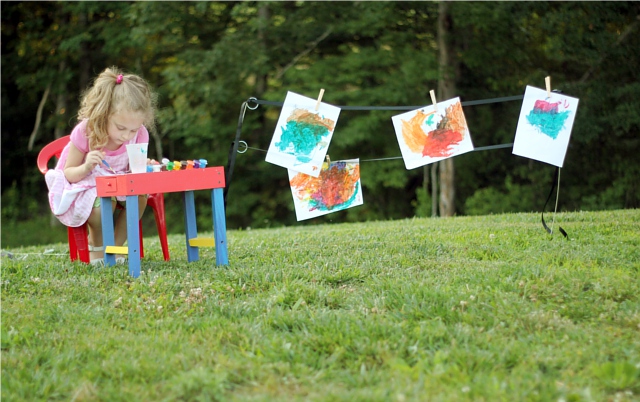
My little girl loved it. 🙂
‣ ‣ ‣ IDEA #3: Crafty display!
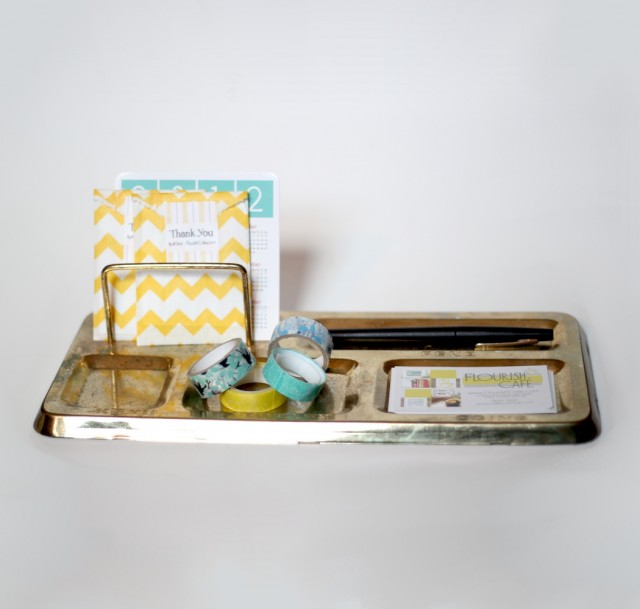
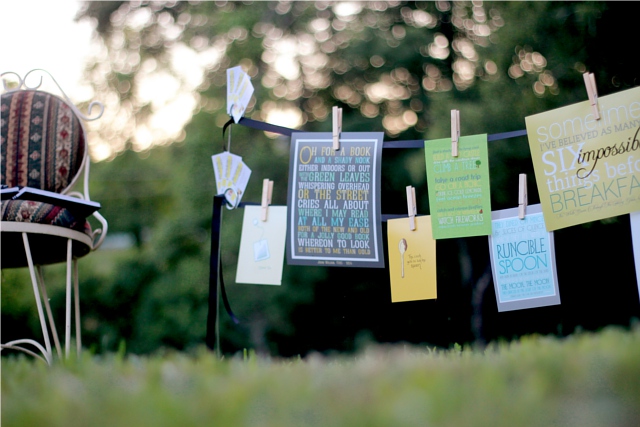
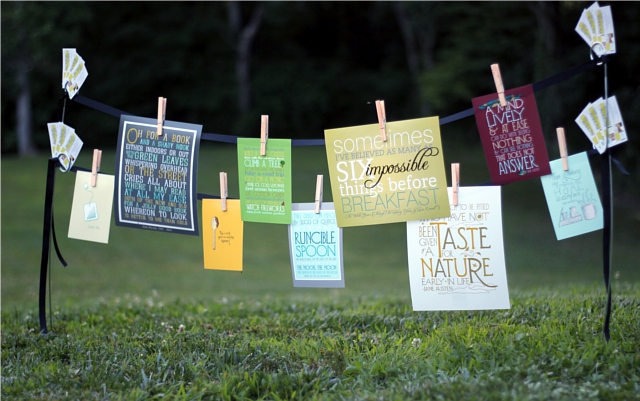
Displaying art is not just for little kids, of course. Sometimes you have your own art and such to display … such as if you have a craft booth at a farmer’s market or fair. And it wouldn’t be limited to hanging art .. you could hang signs or info about your goods, or even fliers for people to take. But it might be a new and eye catching way to display your crafty wares. Here it is, with some of my own prints from my shop, FlourishCafe.
‣ ‣ ‣ IDEA #4: Wedding sign!
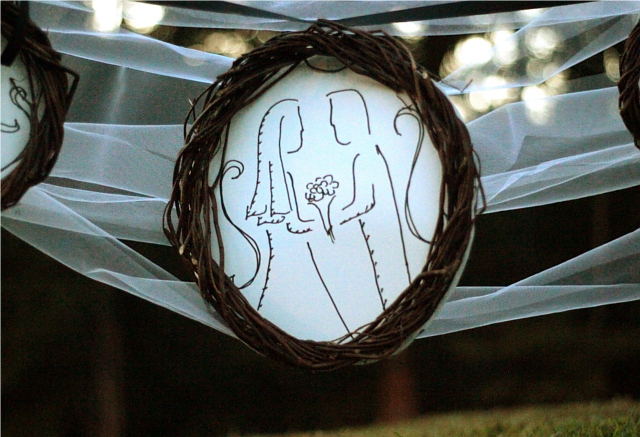
One of the things I learned in getting ready for our wedding, almost six years ago, was that anything labelled “wedding” or “bridal” automatically cost twice as much as the same exact item not labelled “wedding”. For instance, white wedding table cloths vs. just white table cloths. There may be no discernible difference between them except for the fact that one has the word wedding on the label, but it’s generally going to cost a lot more. As a result, I found that buying non-official-wedding-items-that-were-still-white-and-looked-just-like-wedding-items and using them for the wedding was a lot more cost effective. The same idea struck me with these. Now I’m sure you would want to disguise them or paint them, but at an outdoor wedding (like mine was) I imagine the stakes in the ground with swags of tulle going back and forth, with bows at either side, and maybe a sign hanging in the middle that says “Seating this way” or “take a program”, and have a basket of programs next to it, etc. For this particular example, I recreated a quick version of the illustration I made for our wedding invitations and attached it to the back of a light-weight willow wreath, and hung it in front of sways of tulle. Unfortunately the light was failing as I was working on this last night, and so I didn’t get a decent shot of the whole thing, but I’m sure you get the picture. Here is a shot, though, of the “framed” illustration hung between the sign stakes:
Tim liked seeing it. 🙂
Anyway, those are a few ideas for ways to repurpose a simple item – a sign stake! Which is your favorite? Or do you have another idea to share?
Let me know in the comments below, I love to hear from you! 🙂
Posted in art, Challenge, creative biz, hack a week, home decor, style, upcycling


