There’s something about a perfectly flaky, golden cheese Danish that takes you straight to a quaint café in Copenhagen. Whether you’re sitting on a balcony in the heart of Europe or enjoying the simple comforts of your kitchen, this recipe invites a delicious adventure.
Making this Danish is all about layering flavors and mastering the art of dough. Similar to the buttery croissants of Paris or the sweet pastries of Italy, the magic lies in the way the dough rises and embraces the creamy filling.
What’s exciting about this recipe is how versatile it is. You can infuse it with flavors from anywhere—perhaps a touch of vanilla from Madagascar, or a twist of lemon zest from the Mediterranean. Whether you make them for a cozy breakfast or an afternoon treat, these Cheese Danishes will inspire you to keep experimenting.
Perfect for Summer Gatherings!

- I first made these Cheese Danishes for a summer brunch with friends, and they were a hit. The balance of crispy pastry and creamy filling made for the perfect bite in the warm weather.
- This recipe is a great way to celebrate summer mornings—lighter than a heavy cake but just as indulgent. It’s a great crowd-pleaser and pairs well with coffee or iced tea.
- Over the years, I’ve swapped in different fruits like berries or peaches to add a seasonal twist. It’s amazing how you can make this one recipe feel fresh every time.
- These Danishes are surprisingly easy to make. What I love is that they can be prepped ahead of time, so all you have to do is bake them fresh before serving.
- They taste so good that even a slight variation in the filling can make a huge difference. Whether you’re adding a dash of cinnamon or some fresh citrus zest, each bite offers a new layer of flavor.
Tastes amazing!

Cheese Danish Recipe
Equipment
- Baking sheets
- Parchment paper
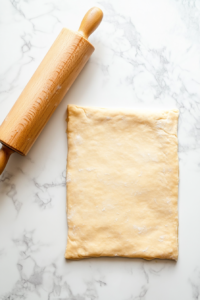
- Rolling pin
- Mixing bowls
- Whisk
- Pastry brush
Ingredients
- 1 batch of homemade puff pastry
Egg Wash
- 2 tsp water
- 1 large egg
Filling
- 1 tsp lemon juice
- 8 oz cream cheese softened
- ¾ tsp vanilla extract
- ½ cup granulated sugar
Glaze
- 5 tbsp milk
- 1 cup powdered sugar
- ½ tsp vanilla extract
Instructions
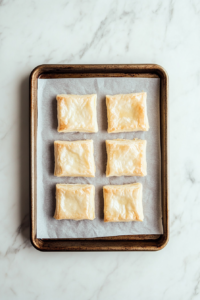
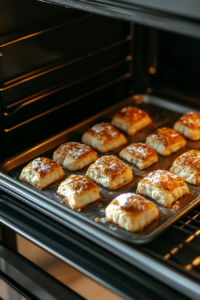
- Preheat the oven to 400°F (205°C) and line two baking sheets with parchment paper.

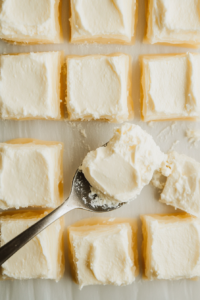
- In a bowl, mix cream cheese, sugar, lemon juice, and vanilla extract until smooth.

- If using homemade puff pastry, divide it in half and roll one portion into a 12×12” square.
- For store-bought pastry, ensure it's divided into two sheets.
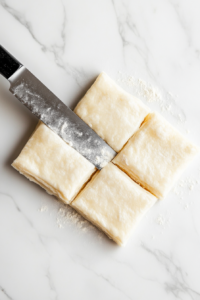
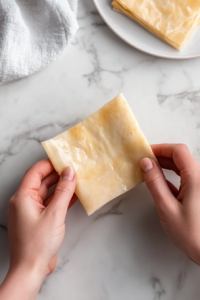
- Cut the rolled pastry into four even squares and place them on a prepared baking sheet.
- Spoon about two tablespoons of filling into the center of each square.
- Fold the corners over the filling, leaving a small gap in the center and between folds.
- In a separate bowl, whisk together an egg and water to make an egg wash, then brush it generously over the pastries.

- Bake for 17-19 minutes until golden brown.
- While baking, prepare the glaze by whisking together powdered sugar, milk, and vanilla extract.

- Let the pastries cool before drizzling them with the glaze.

- Repeat the steps for the second portion of puff pastry.
- Serve and enjoy!

Notes
- Ensure the cream cheese is softened to room temperature for a smooth, lump-free filling.
- If using frozen puff pastry, work quickly, as it becomes sticky as it warms.
- To enhance the flavor, try adding a pinch of cinnamon or nutmeg to the filling.
| Nutrition | Value |
| Calories | 532kcal |
| Carbohydrates | 46g |
| Fibre | 3g |
| Fat | 35g |
| Protein | 10g |
| Cholesterol | 90g |
Tips To Ease Your Job!
- Use Pre-Cut Puff Pastry – If possible, buy pre-rolled and pre-cut puff pastry sheets to skip the rolling and measuring step.
- Chill the Pastry – Keep the puff pastry cold before assembling to prevent it from becoming sticky and hard to handle.
- Room Temperature Cream Cheese – Let the cream cheese soften before mixing for a smooth and easily spreadable filling.
- Use a Piping Bag – Instead of spooning the filling, pipe it onto the pastry for a neater and quicker assembly.
- Prepare the Egg Wash and Glaze in Advance – Having them ready will speed up the process and reduce cleanup time.


